Optical Flats
PRECISION OPTICAL FLATS

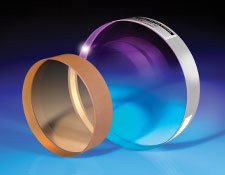
An optical flat is a precisely polished flat surface, used as a reference against which the flatness of an unknown surface may be compared. Edmund Optics offers both single surface and dual surface optical flats in either ZERODUR® or Fused Silica. The flatness of an optical flat is measured in fractions of a reference wavelength, 632.8nm. A λ/20 flat will have a maximum peak to valley deviation of 632.8/20 or 31.64nm. We offer several levels of flatness for our single surface flats: λ/4, λ/10, and λ/20. For our dual surface flats, ¼, 1/10 and 1/20 flatness are available.
WHAT AN OPTICAL FLAT SHOWS
When an optical flat's polished surface is placed in contact with a surface to be tested, dark and light bands will be formed when viewed with monochromatic light. These bands are known as interference fringes and their shape gives a visual representation of the flatness of the surface being tested. The surface flatness is indicated by the amount of curve and spacing between the interference fringes. Straight, parallel, and evenly spaced interference fringes indicate that the work surface flatness is equal to or higher than that of the reference surface.
APPLICATIONS
Measurement of the surface flatness of polished surfaces can be determined visually by comparing the variations between a work surface and the surface of an optical flat. Optical flats are versatile optical components used in many applications, such as: inspection of gauge blocks for wear and accuracy, as well as the testing of various components including windows, prisms, filters, mirrors, etc. They can also be used as extremely flat optical windows for demanding interferometry requirements.
HOW AN OPTICAL FLAT WORKS

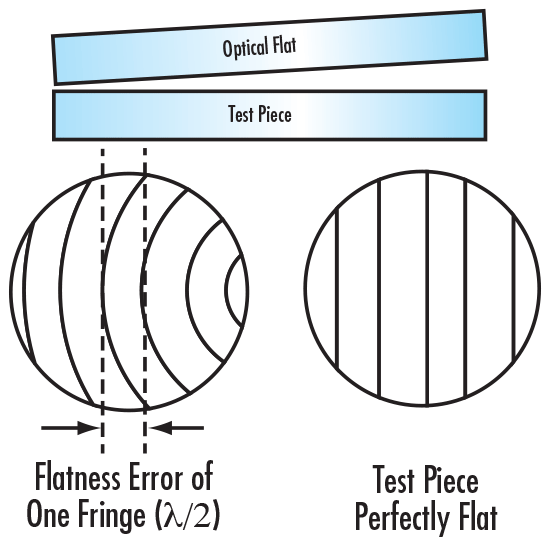
Figure 1: How an Optical Flat Works
An optical flat utilizes the property of interference to exhibit the flatness on a desired surface. When an optical flat, also known as a test plate, and a work surface are placed in contact, an air wedge is formed. Areas between the flat and the work surface that are not in contact form this air wedge. The change in thickness of the air wedge will dictate the shape and orientation of the interference bands. The amount of curvature that is shown by the interference bands can be used to determine the flatness of the surface. If the air wedge is too large, then many closely spaced lines can appear, making it difficult to analyze the pattern formed. Simply applying pressure to the of the optical flat alleviates the problem.
The determination of the flatness of any particular region of a surface is done by making two parallel imaginary lines; one between the ends of any one fringe, and the other at the of that same fringe. The number of fringes located between the lines can be used to determine the flatness. Monochromatic light is used to create sharp contrast for viewing and in order to specify the flatness as a function of a single wavelength.
WHICH ACCURACY SHOULD BE USED - λ/4, λ/10, λ/20
This is a commonly asked question and the answer is dependent on what is being tested. If the surface that is being tested is flatter than λ/4, then a more precise flat will be required to show a change in the interference pattern. In this case, a λ/4 flat would exhibit straight parallel lines, but λ/10 or λ/20 flats would show enough curvature in the fringes to measure the surface accuray.
WHAT MATERIALS SHOULD BE USED - FUSED SILICA OR ZERODUR®?
Fused Silica: We use a clear optical fused silica, which has a very low thermal expansion of 0.55 x 10⁻⁶ per °C. Being highly durable and having good resistance to abrasion makes fused silica a good choice for applications that are high in wear and tear. Full mechanical, thermal, electrical, and chemical specifications are available.
ZERODUR®: Yellow tinted ZERODUR® is a clear glass ceramic developed by Schott Research Labs. ZERODUR® exhibits an extremely low thermal expansion of ±0.10 x 10 -6 per °C. In applications where temperature fluctuation is a concern, ZERODUR® offers a thermal stability that is unmatched. Full mechanical, thermal, electrical, and chemical specifications are available.
OPTICAL FLAT CERTIFICATION

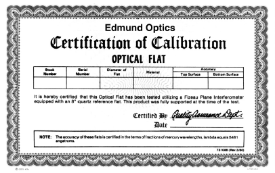
Figure 2: Optical Flat Certification of Calibration
The primary surface of all Edmund Optics optical flats is precision ground and polished to the stated flatness and is tested and certified on our Zygo GPI-XP Interferometer. The secondary surface of our single surface flats is pitch polished to window quality only for viewing the interference pattern. Each flat comes with a certificate of calibration (λ/20 only) and its own storage case for permanent protection.
In-House Interferometric Testing
Each optical flat and plano precision mirror is tested for flatness error using our Zygo GPI-XP Interferometer. With the aid of the interferometer and other precision testing equipment, Edmund Optics is able to provide and ensure the highest quality optics.
RECALIBRATION
Please note that over time and with repeated use, optical flats can lose their degree of precision. Our Optical Lab can recalibrate and recertify our flats for a fee. For full details on our optical flat recertification, please contact our Sales Department.
版權(quán)所有 © 2025 江陰韻翔光電技術(shù)有限公司 備案號:蘇ICP備16003332號-1 技術(shù)支持:化工儀器網(wǎng) 管理登陸 GoogleSitemap